Testing analog sensors
Analog sensors, e.g. LDR, pressures sensor, potentiometer, etc.
Steps
1. Remember the FSR circuit connection we learned in Week 6? We’ll use the same setup to test the textile pressure sensor, but this time we’re replacing the FSR with two jumper wires.

2. Clip the two alligator test leads to the two jumper wires you connected in Step 1.

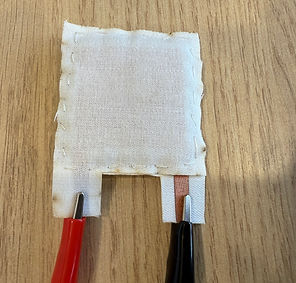
3. Connect the other ends of the alligator clips to your sensor. Make sure the clips are attached to the conductive areas of the test sensor. The circuit setup is completed!
4. Download this Arduino Code, open the sketch, connect your Arduino board using the USB cable, select the correct port, and upload the code to your Arduino board.
5. Open the P5.serialcontrol app, scan for available ports, and connect to the same port your Arduino is using. Make sure to tick ‘Console Enabled’ and ‘Read in ASCII’. Now, as you manipulate your sensor, you should see the readings change in real time.
6. Open this P5 sketch, modify the code at line 16 to match your own port, then run the code. You should hear the pitch rise as you manipulate the sensor.